

Kubernetes applications are simply software programs designed to run on a Kubernetes cluster. These applications can be considered collections of code, scripts, and other files that have been packaged together in a way that makes them easy to deploy and manage on a Kubernetes cluster.
Several tools are available to install Kubernetes (k8s) apps, including Helm, Kustomize, and kubectl.
Helm is a package manager for Kubernetes that helps make it easier to install and manage applications in a Kubernetes cluster. The Helm client is the command-line interface (CLI) tool that you use to interact with Helm.
Think of the Helm client as a tool that helps you manage a collection of pre-defined application templates called “charts.” A chart is a collection of files describing a set of Kubernetes resources needed to run an application. These resources include deployments, services, and ingress rules.
Using the Helm client, you can search for charts in the Helm repository, customize their settings, and install them in your Kubernetes cluster. You can also use the Helm client to upgrade, rollback, or uninstall applications as needed.
To install an app on Kubernetes using Helm, you can follow these general steps:
- Install Helm on your local machine and add the required repositories.
- Create a Helm chart or use an existing one that describes the Kubernetes resources required for your app.
- Customize the chart values file to specify any configuration options necessary for your app.
- Install the chart using Helm with the appropriate values file.
Installing Helm
The Helm installation process using package managers will vary depending on your operating system.
- From Homebrew (macOS)
Install Homebrew using the command line in Terminal:
/usr/bin/ruby -e "$(curl -fsSL https://raw.githubusercontent.com/Homebrew/install/master/install)"
Now, install Helm:
brew install helm
- From Chocolatey (Windows)
Install Chocolatey using the command line, running Command Prompt as administrator:
@"%SystemRoot%\System32\WindowsPowerShell\v1.0\powershell.exe" -NoProfile -InputFormat None -ExecutionPolicy Bypass -Command "iex ((New-Object System.Net.WebClient).DownloadString('https://chocolatey.org/install.ps1'))" && SET "PATH=%PATH%;%ALLUSERSPROFILE%\chocolatey\bin"
Now, use the command line to install Helm:
choco install kubernetes-helm
- From Apt (Debian/Ubuntu)
Use the command line in Terminal to add the Helm Repository to your system:
curl https://raw.githubusercontent.com/helm/helm/master/scripts/get-helm-3 | bash
Update the package:
sudo apt-get update
Now, use apt command line to install Helm:
sudo apt-get install helm
- From Installer Script
Run the command lines bellow, for all Operational Systems:
curl -fsSL -o get_helm.sh https://raw.githubusercontent.com/helm/helm/main/scripts/get-helm-3
chmod 700 get_helm.sh
./get_helm.sh
- From Helm Binary
Download and extract the binary release according to your OS
Move your binary to the executable path folder. Now the OS will be allowed to recognize and execute it as a command.
mv linux-amd64/helm /usr/local/bin/
Now, you can run the command version to verify installation:
helm version

Since you installed Helm, you can deploy and manage applications on Kubernetes. Here are some steps to follow:
Find the Helm chart you want to deploy by searching the Helm repository using the Helm search command. These charts are pre-packaged templates that define the Kubernetes resources needed to run the application.
Once you have found the chart you want to use, you can deploy it using the Helm install command. This will create all the necessary Kubernetes resources for your application to run.
Helm charts are highly configurable, so you can customize them to suit your needs. To do this, you can modify the values.yaml file in the chart to change settings like the application name, environment variables, and resource limits.
If you need to change the chart after deployment, use the Helm upgrade command. This will update the Kubernetes resources that make up the application to reflect your changes.
How can Taikun help me?
In Taikun, you can use the Applications and Repositories features to deploy and manage your Kubernetes resources without using command-line tools like Helm. Here’s how these features work. As a result, Taikun provides a simplified developer experience for building, deploying, and managing applications on Kubernetes.
To use Taikun to install applications in a Kubernetes cluster, you first need to create a Project and add your Kubernetes cluster as a target.
If you choose to use a Helm chart, add it to your Taikun project and customize its configuration as needed. Taikun provides a visual editor that makes it easy to configure your Helm chart, even if you are unfamiliar with the underlying YAML files.
Taikun Applications: With the Applications feature, you can deploy your applications to your Kubernetes cluster by providing the necessary information in a user-friendly interface. You can add new applications, modify existing ones, or delete them as needed, all within the Taikun interface.
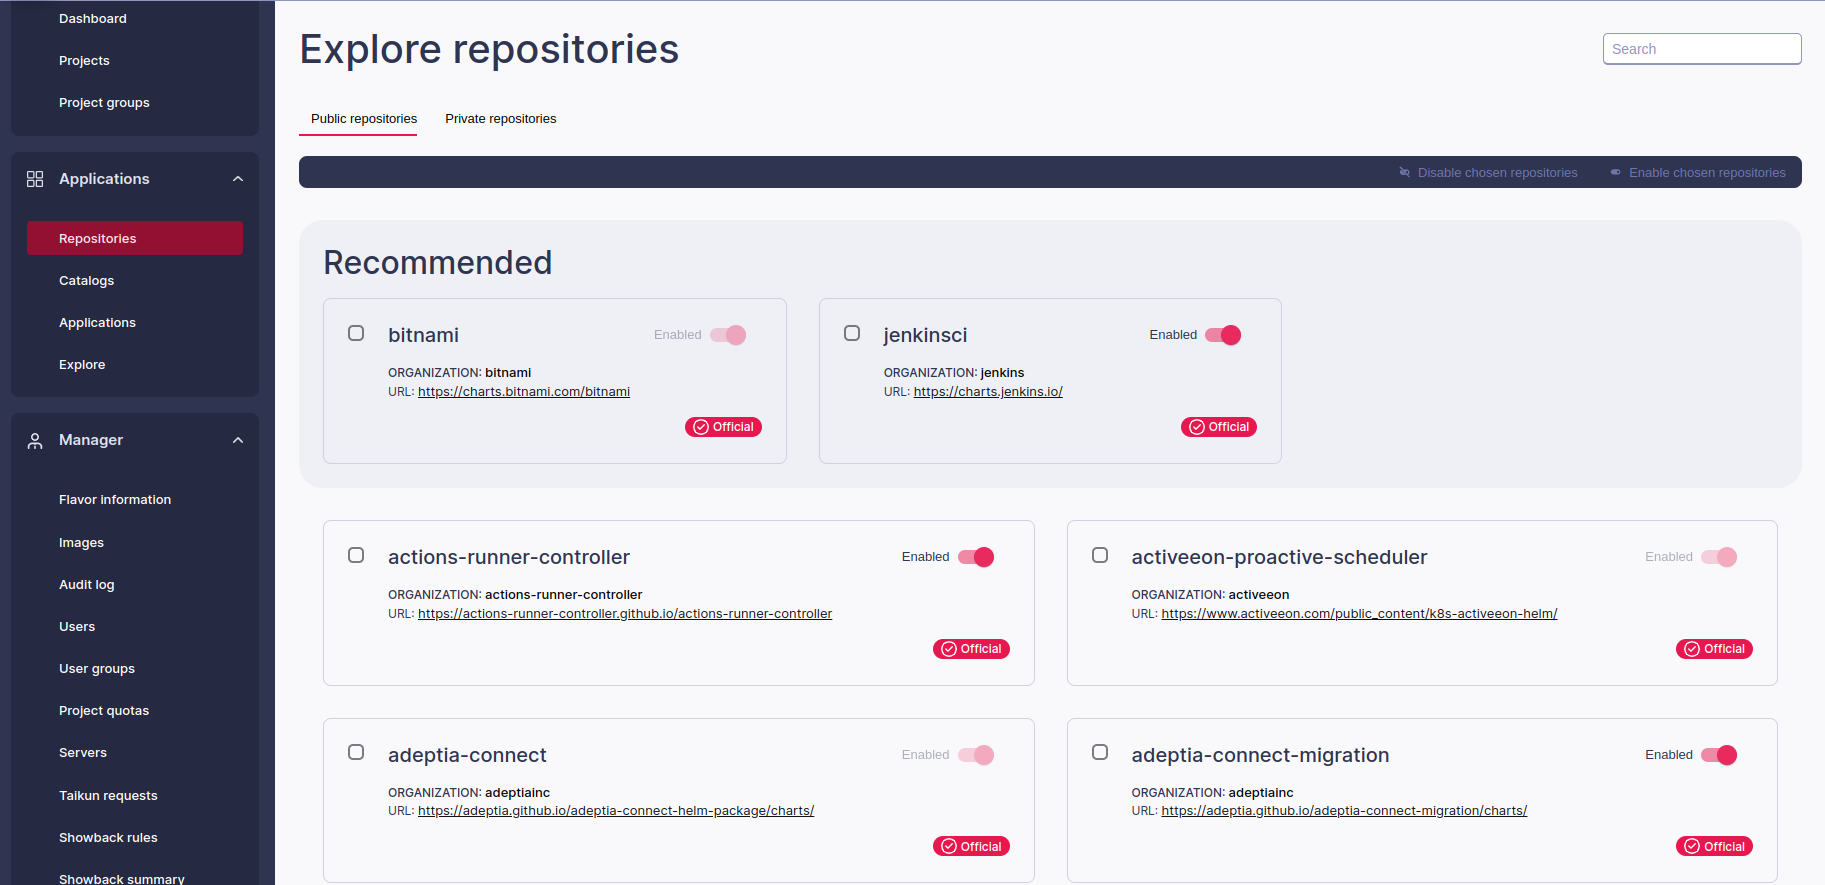
Taikun Repositories: With the Repositories feature, you can browse and deploy pre-packaged charts or images from different sources. With a few clicks, you can add new repositories, browse their contents, and deploy the available charts or images to your Kubernetes cluster.