


Most containerized applications need some form of communication with other network devices and applications. This is where container networking concepts play an important role. In this blog, we will tell you everything you need to know about container networking and how to get started on it.
We will be covering most of the container networking concepts on Docker, as it is one of the most common platforms for running containers. But these concepts will be similar across many container platforms.
Let’s start by understanding the type of networking options available in Docker and the difference between them.
Types of Container Networking
Docker containers connect to other devices in the network via the host. This is done by creating a layer of software-defined network (SDN) over the host. Other devices do not even need to know that they are connected to a Docker container.
The networked devices can be on any platform and host. There is no special setup needed to network Docker containers across Linux, Mac, or Windows systems.
Below are the types of networks that can be set in a Docker container:
Bridge network
Docker creates a default bridge network named docker0 when it is installed. Every container is part of this bridge network unless otherwise specified. This is a virtual Ethernet bridge that can send packets across all the devices in the network.
Docker also creates two other networks called host and none.
“host” ensures that there is no isolation between the host and the containers within it. So for the outside world, all of them are on the same network.
“none” ensures that the containers attached to the bridge run a container-specific network stack.
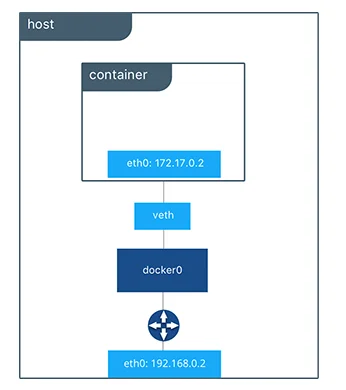
All containers on a host are connected to each other on this internal network. All containers are added to the namespace of the host. This assigns a private IP address/subnet to the bridge.
If you wish to communicate with any of the containers on the bridge network from the outside world, you will need to do port mapping with the host.
For example, say a web service container running on port 80 needs to be accessed from the outside world. For this, a free port on the host, say 8080 for example, needs to be mapped to port 80 of the container.
You can also create your own bridge network with a “docker network create” command.

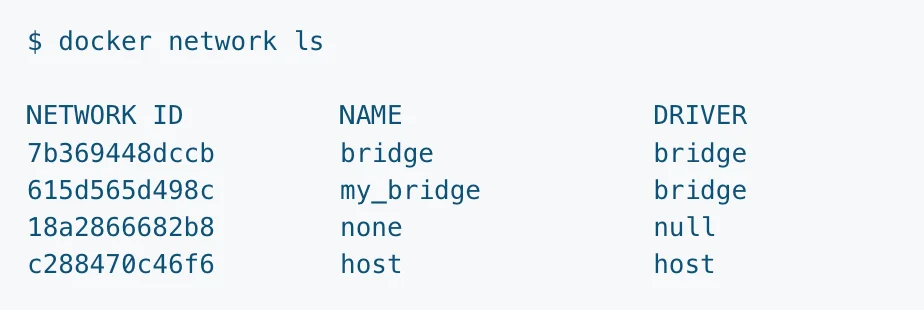
-d flag tells the kind of network driver to use while creating the custom network. In this case, it is a “bridge” network with the name “my_bridge”. You can list all the networks on the host with the “docker network ls” command.
To attach the container to your custom bridge network instead of default “docker0”, run the below command when you start the container:

Our network would now look like this:
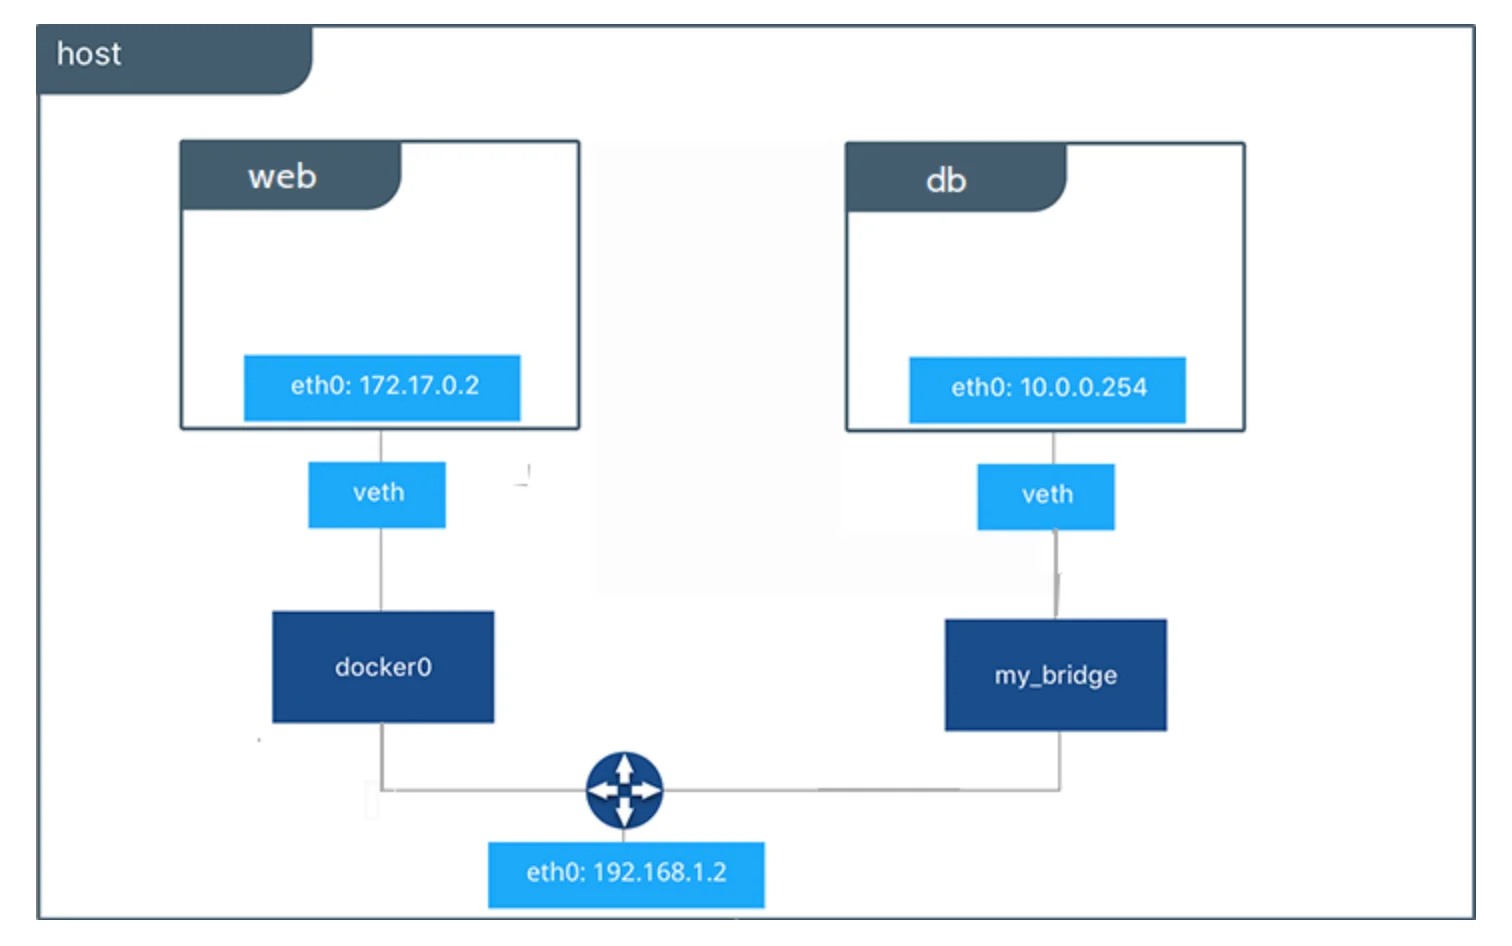
“veth” means virtual ethernet.
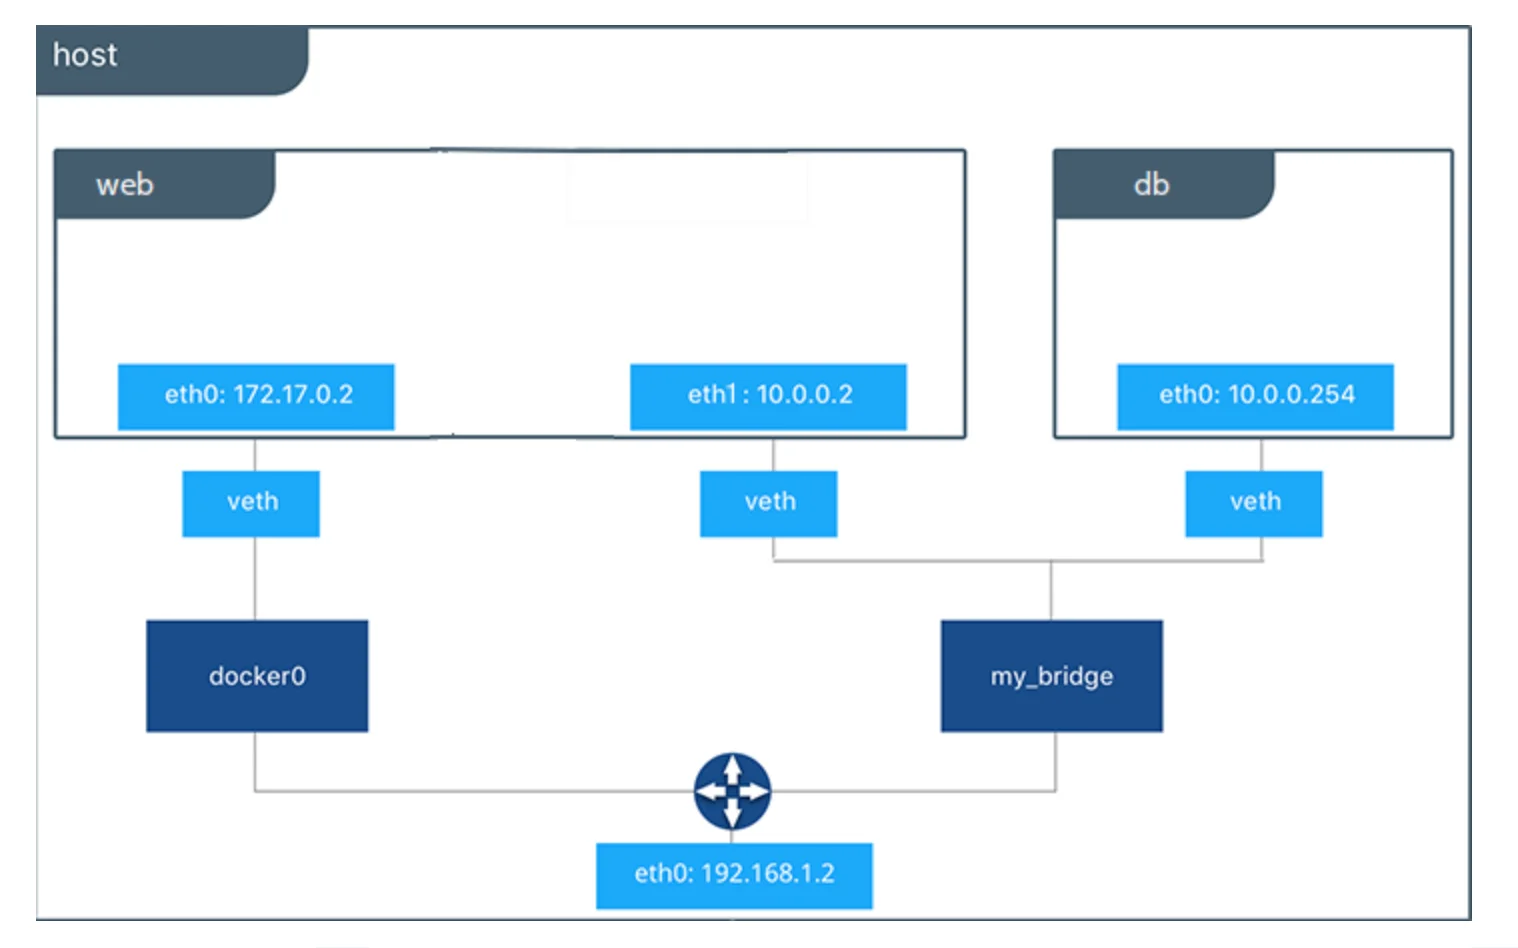
If you wish to connect a running container to a new bridge network, you can do that by “docker network connect” command.
For example, if you wish to connect the container “web” to the new bridge network “my_bridge”.

With this, our network would now have the container web connected to two bridge networks: docker0 and my_bridge.
If you wish to read more about bridge networking, you can read in the Docker documentation.
Host network
As discussed in the previous section, Docker creates a “host” network which helps make the container and host seen as the same device for the outside world. This makes it easy to communicate with all the network devices.
While the host network driver allows no isolation between the host and container from a networking standpoint, it also allows for isolation for storage, process namespace, and user namespace.
For example, say you want to connect your Nginx container to the host machine port to access it directly from the host machine’s IP address. Assuming port 80 (nginx’s default port) is free on host, the following command will remove the container-host isolation:

–rm option makes Docker remove the container once it stops.
-d flag is to run the container in detached format.
–network mentions the kind of network being set up.
my_nginx is the local name given to the nginx container.
This command will enable you to access Nginx on the host with http://localhost:80/
You can read more about host networking in Docker’s documentation.
Overlay network
Docker has a container orchestration service called Docker Swarm. In this setup, multiple containers (called workers) are managed by a central manager container. This allows you to create, manage and destroy containers automatically as per the resource requirements.
With an overlay network, you can connect multiple docker daemons and allow swarm services to communicate with each other. It creates a distributed network that sits on top of host-specific networks.
Similar to bridge networks, you can create your own custom overlay network with “docker network create” command.

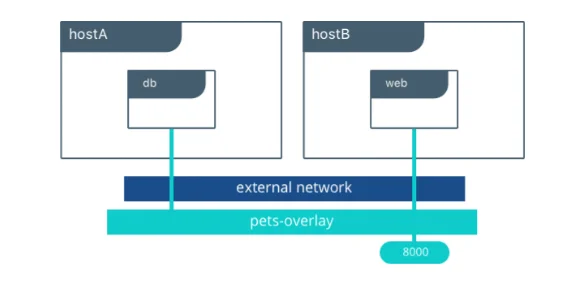
The above command would create an overlay network named pets-overlay with an encrypted communication channel. Next, we need to attach docker containers to the network.


The above two commands will help deploy a web application on port 8000 across multiple hosts and using a Redis database. Docker swarm helps load balance the traffic to be able to scale quickly.
You can read more about overlay networks from the Docker documentation.
IPvlan network
IPvlan drivers are used when you want complete control over IPv4 and IPv6 addressing. The network driver gives total control of layer 2 VLAN tagging and IPvlan L3 routing for underlay network integration.
IPvlan requires Linux kernel v4.2+. Let’s us see an example of IPvlan L2 mode.
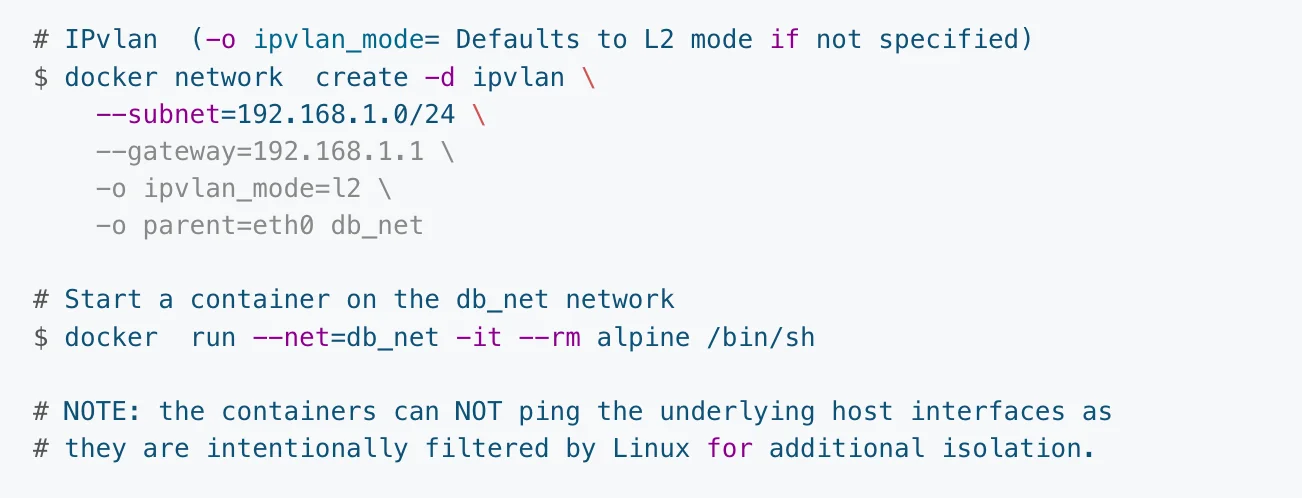
The above “docker network create” command sets a L2 IPvlan and uses the host’s interface network as a –subnet. The default mode for IPvlan is L2. –gateway uses the first usable address in the network as the gateway.
In the above example, since the subnet is 192.168.1.0/24, the gateway is its first usable address i.e., 192.168.1.1.
Architecturally, the network would look something like this:
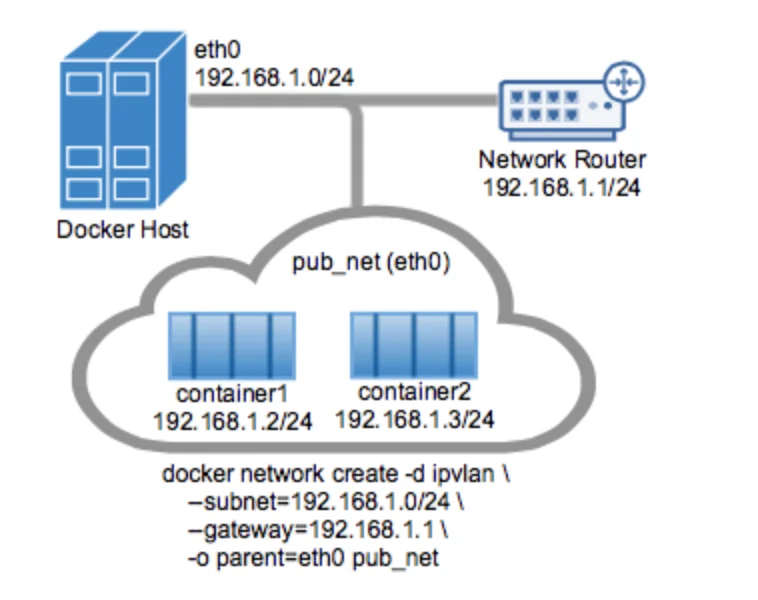
You can learn more about IPvlan networking from Docker documentation.
Macvlan network
Macvlan network driver allows assigning a MAC address to a container. This helps in making the container look like a physical device in a network. Some of the legacy applications require a direct connection to the physical network rather than being routed through the Docker host’s network stack.
With a macvlan network, the Docker host accepts requests for multiple MAC addresses on its IP address and then routes them to appropriate containers. Macvlan networks only work with Linux hosts with kernel v4.0+.
There are two ways to set up a macvlan network: bridged macvlan network or 802.1q trunked macvlan network.
Let us see an example of creating a macvlan bridged network:
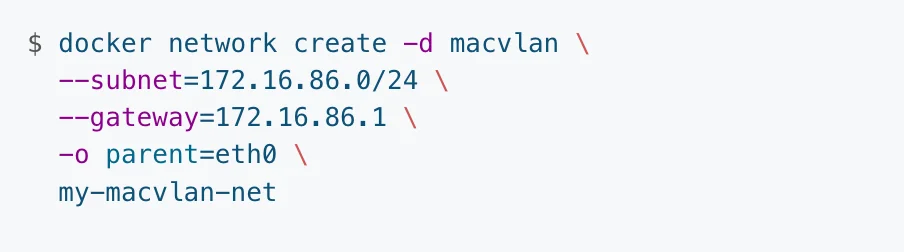
The above command will create a bridge macvlan with the name my-macvlan-net. To see if the command ran successfully, you can run a “docker network ls” command to see the list of networks.
You can also run a “docker network inspect my-macvlan-net” command to verify the newly created macvlan network.
If you wish to learn more about the Macvlan network, check out the Docker documentation.
How to Disable networking in a container
There are occasions when you may wish to disable all networking in a container. You can do so with the option “–network none” in the docker command. Here is a sample command to create a container with networking disabled.
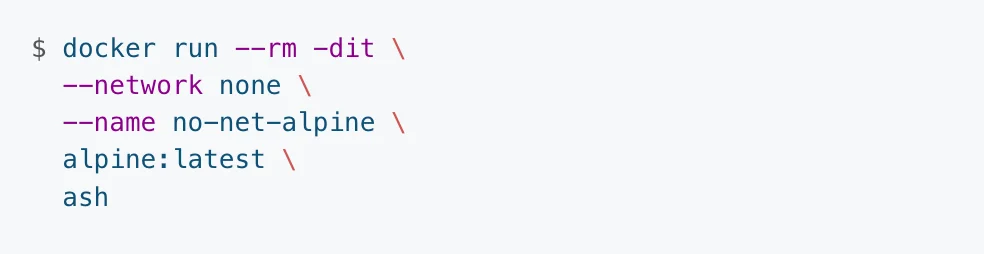
–rm option ensures the container is removed when it is stopped.
Using third-party network plugins
Docker also allows you to create your own custom network plugin. Some of the popular ones include Contiv, Kuryr, and Weave network plugins. Make sure you look at the vendor’s documentation before installing any of them.

You can read more about network plugins in Docker here.
Useful Docker networking commands
Let us now see some of the useful commands that you will need to get around with Docker networking. Some of these you have already seen in the previous sections. All commands discussed here are child commands of the “docker network” command.
docker network ls
List all the networks available in the Docker ecosystem. ls command has many options, but a simple command will show a result similar to this:

docker network create
This command helps create a new custom network in the docker ecosystem.

The above command will create a bridge network named my-bridge-network.
docker network connect
This command helps connect a container to any existing network in Docker ecosystem. The below command will connect container1 to a network to a network named multi-host-network.

docker network disconnect
Use this command to disconnect a container from a network. Continuing our previous example, the below command will disconnect container1 from multi-host-network.

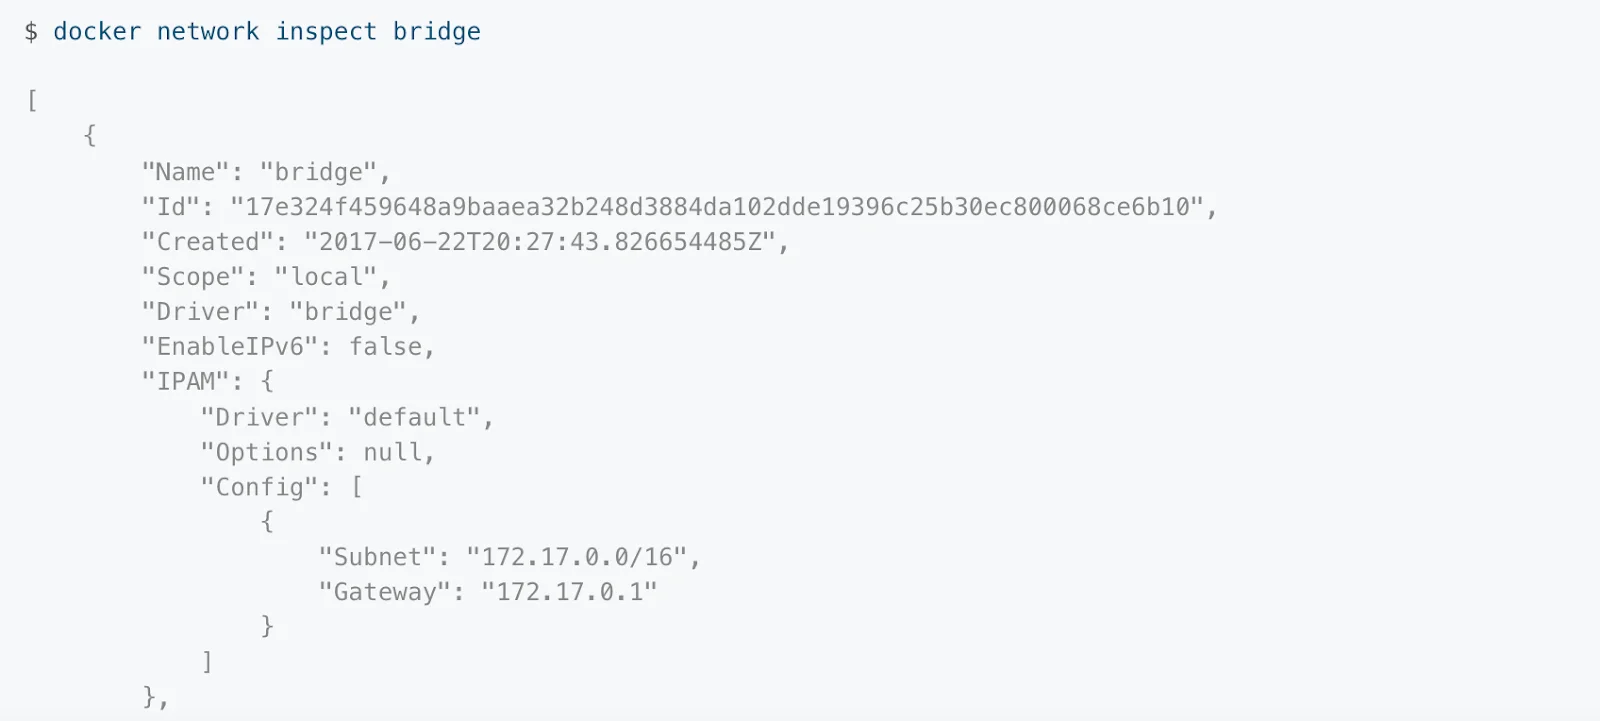
docker network inspect
This command helps get detailed information on any network in JSON format.
docker network prune
The prune command helps remove all unused networks. By unused, we mean any network that is not being used by even one container.

docker network rm
If you wish to remove just one network from the Docker ecosystem, rm command is of use. For example, below command will remove the network my-network.

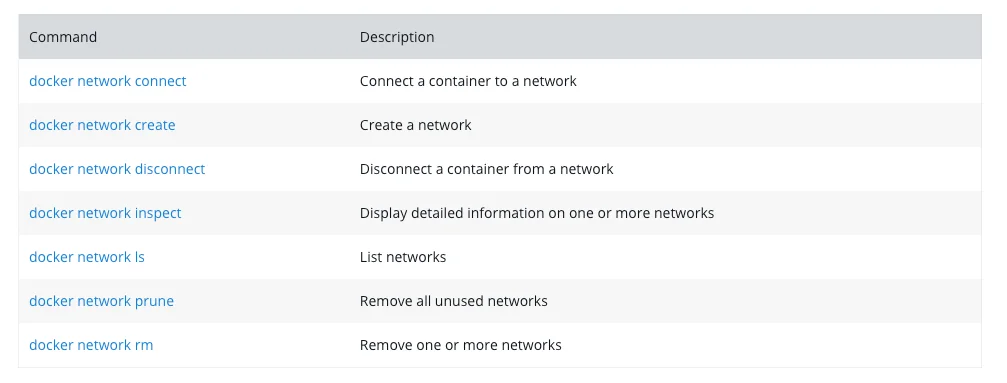
Here is a summary of the basic networking commands we discussed:
Taikun: Automate Container management
Now that you understand the basics of container networking, you will inevitably also need a tool to manage multiple containers deployed across your infrastructure. This is called Container orchestration. Taikun provides a singular intuitive dashboard to manage containers in your network deployed across any private, public, or hybrid cloud.
It supports all major cloud services like Amazon AWS, Microsoft Azure, Google Cloud, and RedHat Open Shift.
