


Introduction
Nginx, pronounced as “Engine-X,” is a high-performance web server, reverse proxy, and load balancer known for its speed, flexibility, and ease of configuration. Originally created by Igor Sysoev, Nginx has grown to become a powerful tool widely used in modern web architectures. This blog post will delve into what Nginx is, its core functionalities, real-life applications, and how to configure it through a hands-on tutorial.
What is Nginx?
Nginx is an open-source web server that can also be used as a reverse proxy, load balancer, and HTTP cache. It was designed to handle a large number of concurrent connections, making it ideal for high-traffic websites.
Key Use Cases of Nginx

- Web Server: Nginx can serve static content such as HTML, CSS, JavaScript, and images efficiently. Its asynchronous, event-driven architecture allows it to handle many connections with minimal resource usage.
- Reverse Proxy: Acting as an intermediary for requests from clients seeking resources from other servers, Nginx improves performance, security, and reliability.
- Load Balancer: Nginx can distribute incoming traffic across multiple servers to ensure no single server becomes overwhelmed, enhancing the website’s performance and reliability.
- HTTP Cache: Nginx can store copies of content to serve subsequent requests without needing to fetch data from the origin server, reducing load times and server load.
Nginx in Action
Load Balancing
As web traffic increased, a single server could no longer handle the load. Nginx steps in as a load balancer, distributing incoming requests across multiple servers using algorithms like round-robin or least connections.
Caching
For static content, such as a New York Times article accessed by millions simultaneously, Nginx can cache the content. Instead of assembling the page for each request, Nginx serves a pre-built copy, significantly improving efficiency.
Security
By funneling all traffic through a single Nginx server, which then proxies requests to backend servers, the attack surface is minimized. This setup makes it easier to secure the server and manage encrypted communications.
Compression
For media-heavy sites like Netflix, which also uses Nginx, compression reduces bandwidth usage. Nginx can compress large files before sending them, speeding up delivery and conserving bandwidth.
Hands-On Tutorial: Getting Started with Nginx
Now that we understand what Nginx is and what it can do, let’s dive into a hands-on tutorial to install and configure Nginx.
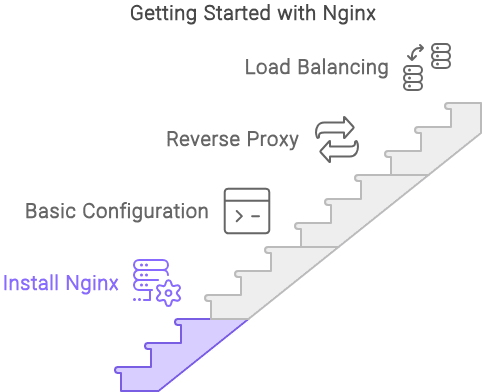
Step 1: Installing Nginx
1. On Ubuntu/Debian
Update Package Index:
sudo apt updateInstall Nginx:
sudo apt install nginxStart Nginx:
sudo systemctl start nginxEnable Nginx to Start on Boot:
sudo systemctl enable nginx2. On CentOS/RHEL
Install EPEL Repository:
sudo yum install epel-releaseInstall Nginx:
sudo yum install nginxStart Nginx:
sudo systemctl start nginxEnable Nginx to Start on Boot:
sudo systemctl enable nginxStep 2: Basic Configuration
Nginx configuration files are located in the /etc/nginx/ directory. The main configuration file is /etc/nginx/nginx.conf.
Creating a Simple Web Server
- Open the Default Configuration File:
sudo nano /etc/nginx/sites-available/default- Configure the Server Block: Replace the contents with the following configuration:
    server {
        listen 80;
        server_name your_domain.com;

        location / {
            root /var/www/html;
            index index.html index.htm;
        }
}- Create the Document Root Directory:
sudo mkdir -p /var/www/html- Create an Index File:
echo "<h1>Welcome to Nginx on your_domain.com!</h1>" | sudo tee /var/www/html/index.html- Test the Configuration and Reload Nginx:
sudo nginx -t
sudo systemctl reload nginx
Step 3: Setting Up Nginx as a Reverse Proxy

- Create a New Server Block Configuration:
sudo nano /etc/nginx/sites-available/reverse-proxy- Configure the Reverse Proxy:
    server {
        listen 80;
        server_name your_domain.com;

        location / {
            proxy_pass http://127.0.0.1:8080;
            proxy_set_header Host $host;
            proxy_set_header X-Real-IP $remote_addr;
            proxy_set_header X-Forwarded-For $proxy_add_x_forwarded_for;
            proxy_set_header X-Forwarded-Proto $scheme;
        }
}- Enable the Configuration:
sudo ln -s /etc/nginx/sites-available/reverse-proxy /etc/nginx/sites-enabled/- Test the Configuration and Reload Nginx:
sudo nginx -t
sudo systemctl reload nginx
Step 4: Load Balancing with Nginx
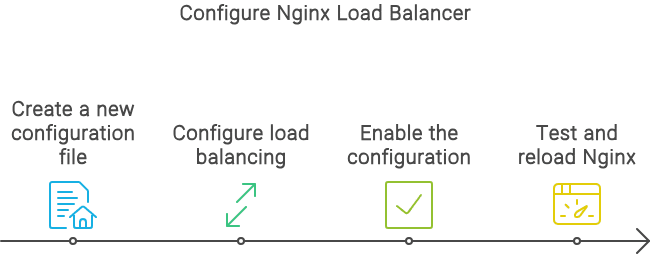
Create a New Configuration File:
sudo nano /etc/nginx/sites-available/load-balancerConfigure Load Balancing:
    upstream backend {
        server backend1.example.com;
        server backend2.example.com;
    }

    server {
        listen 80;
        server_name your_domain.com;

        location / {
            proxy_pass http://backend;
            proxy_set_header Host $host;
            proxy_set_header X-Real-IP $remote_addr;
            proxy_set_header X-Forwarded-For $proxy_add_x_forwarded_for;
            proxy_set_header X-Forwarded-Proto $scheme;
        }
    }
Enable the Configuration:
sudo ln -s /etc/nginx/sites-available/load-balancer /etc/nginx/sites-enabled/Test the Configuration and Reload Nginx:
sudo nginx -t
sudo systemctl reload nginx
Setting up ngnix using Taikun CloudWorks
Alternatively, you can use Taikun CloudWorks to setup ngnix in a few clicks. It is a simplified yet powerful platform that provides the capabilities to automate the building, managing, and deployment of Kubernetes and applications.
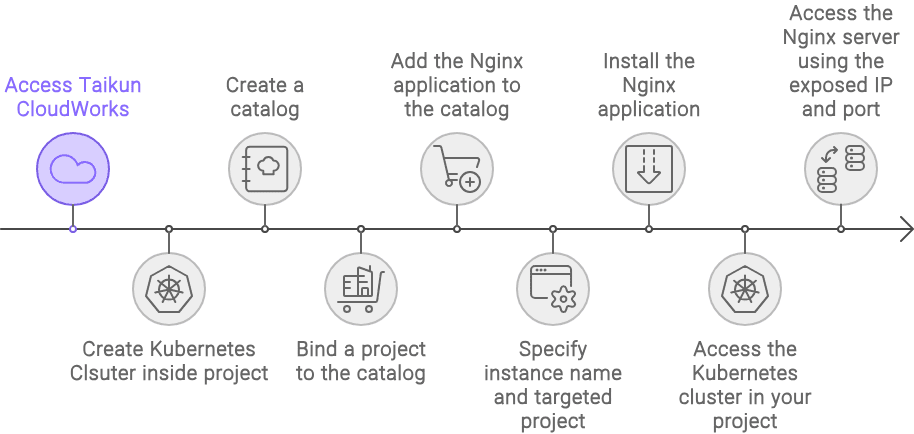
- Sign up to Taikun CloudWorks and create a new account.
- Create a kubernetes cluster inside the project with specifications depending on your requirements.
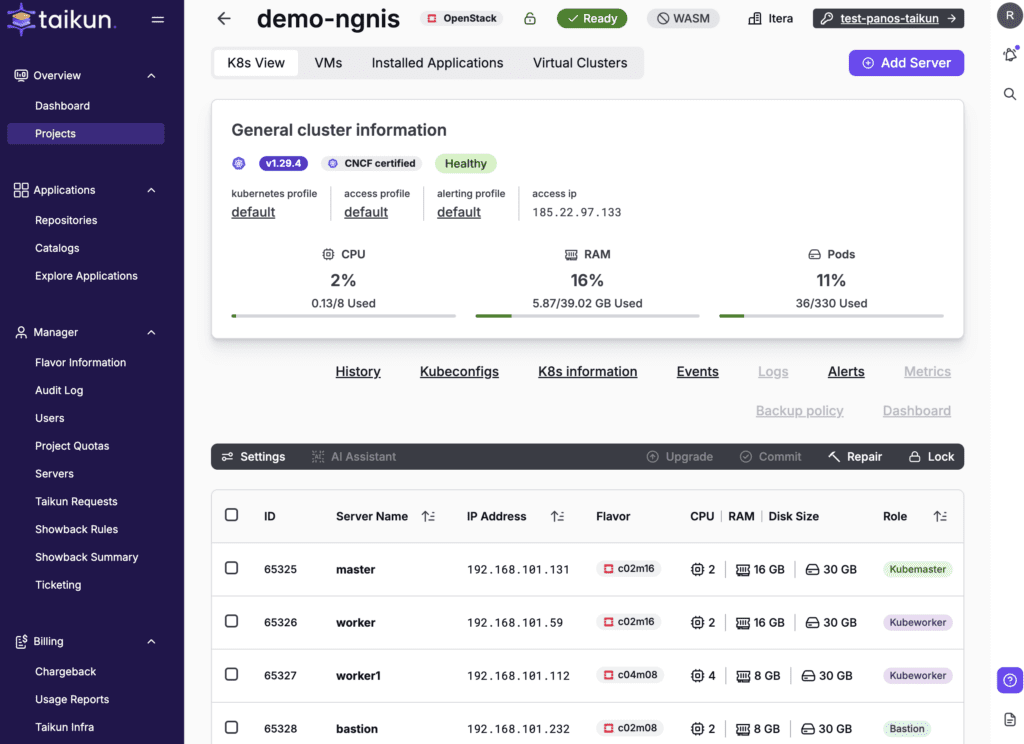
- Installing nginx application to your Kubernetes cluster
- You can refer this documentation for detailed steps.
- In Taikun, you can find more than 320 public and private repositories, which you can import with the Helm Repo URL.
- Public repositories provide access to a wide range of pre-built applications and software packages. You can enable or disable public repositories based on your organization’s needs.
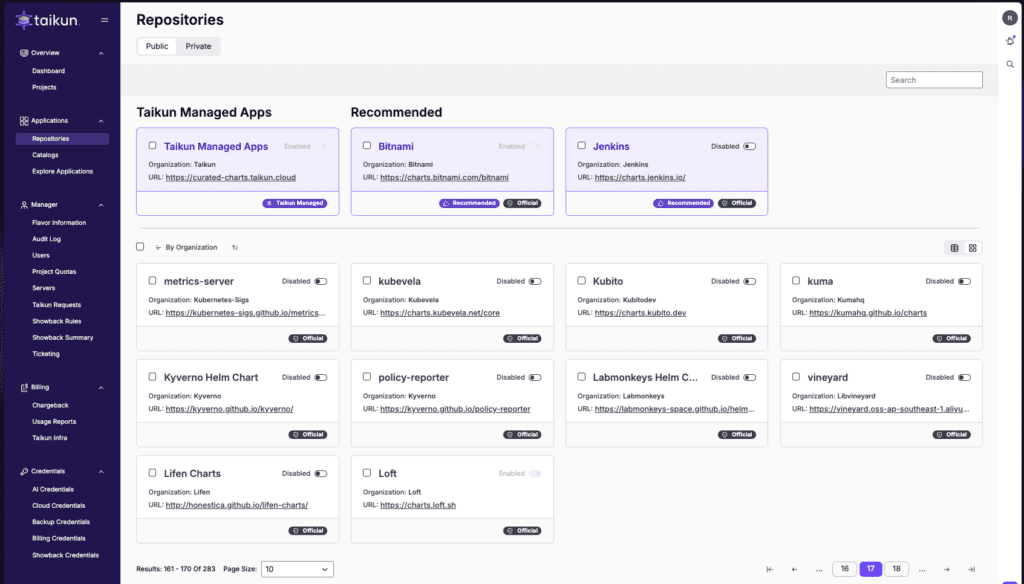
- We support
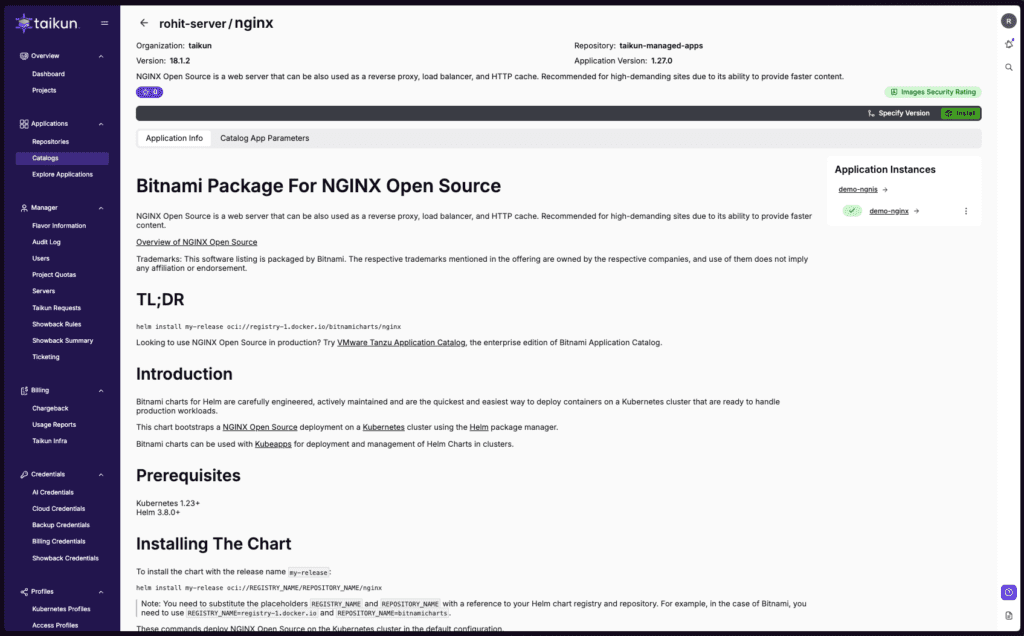
nginxas a public repository available on our platform, but if you want to set up any repository, i.e., not available, you can simply create one using the helm repo link to the private repositories section displayed in the above image. - Create your catalog and bind the project with your kubernetes cluster to this catalog.
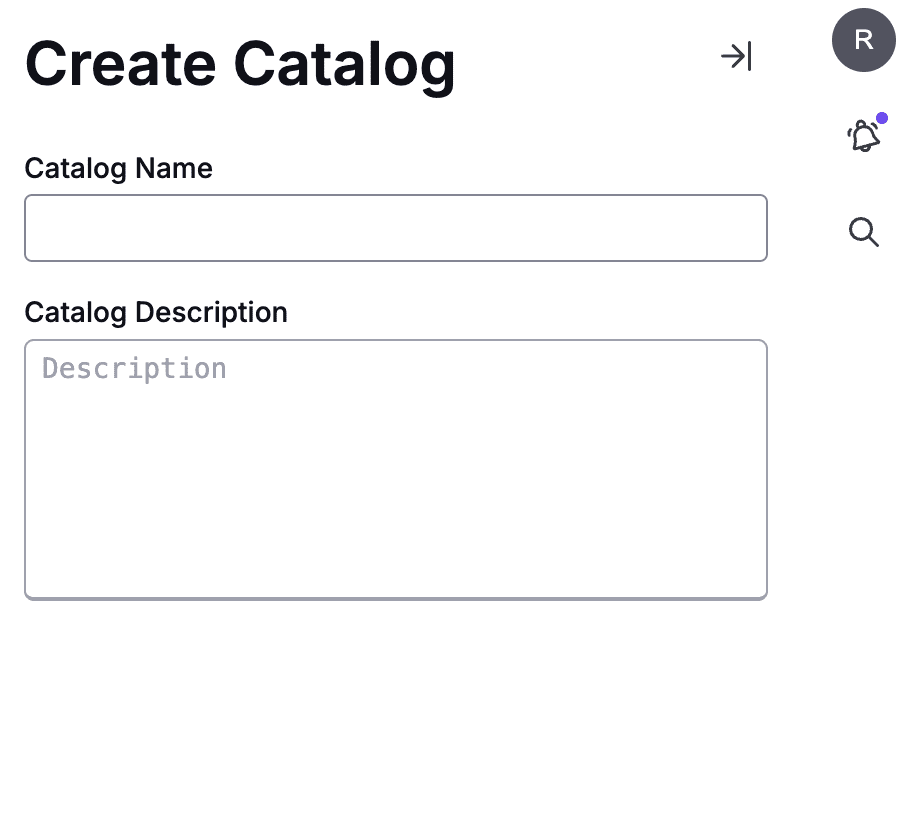
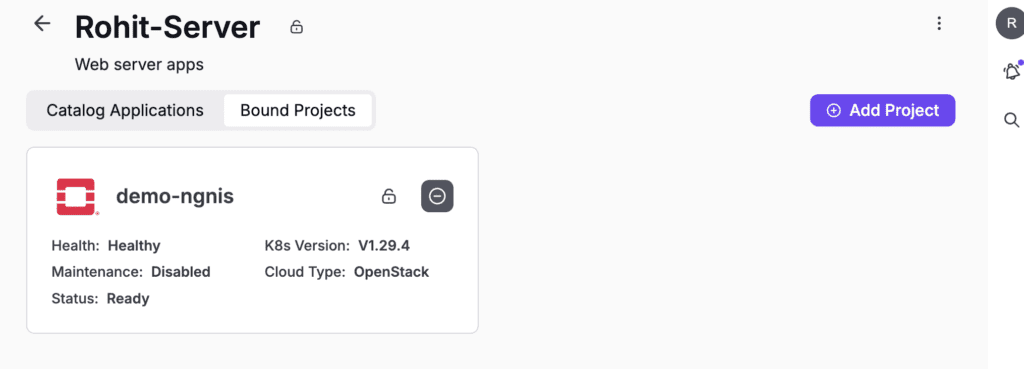
- As you can see, We have named our catalog as
Rohit-serverand bound ourdemo-ngnisproject to it.
- Now, let’s add the
nginxapplication by simply clicking on the (+) icon in our catalog.

- Now, Click the
commitbutton in the above image and specify the Instance Name and Targeted Project for your installation.
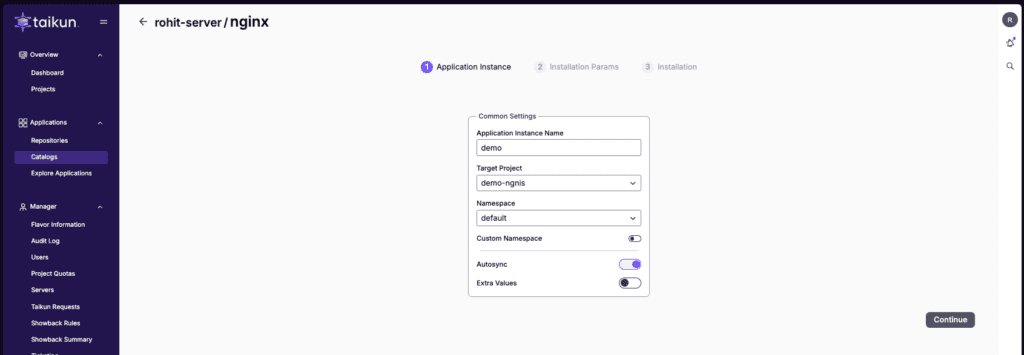
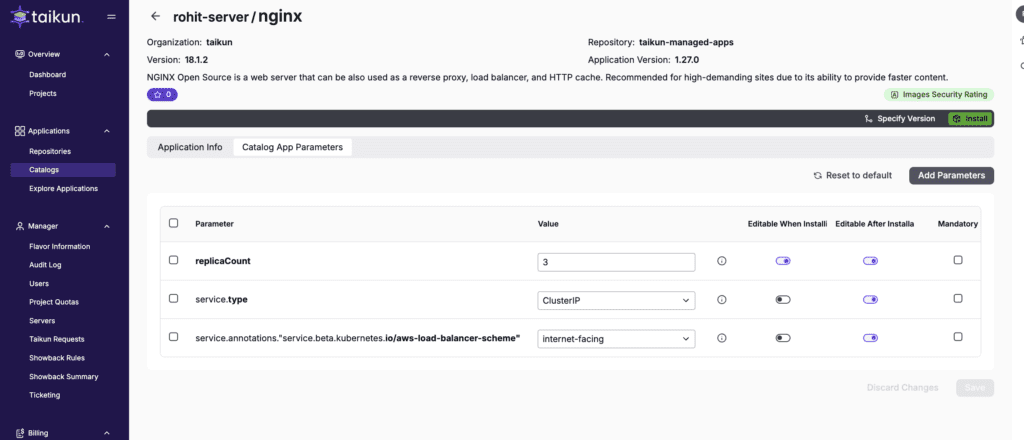
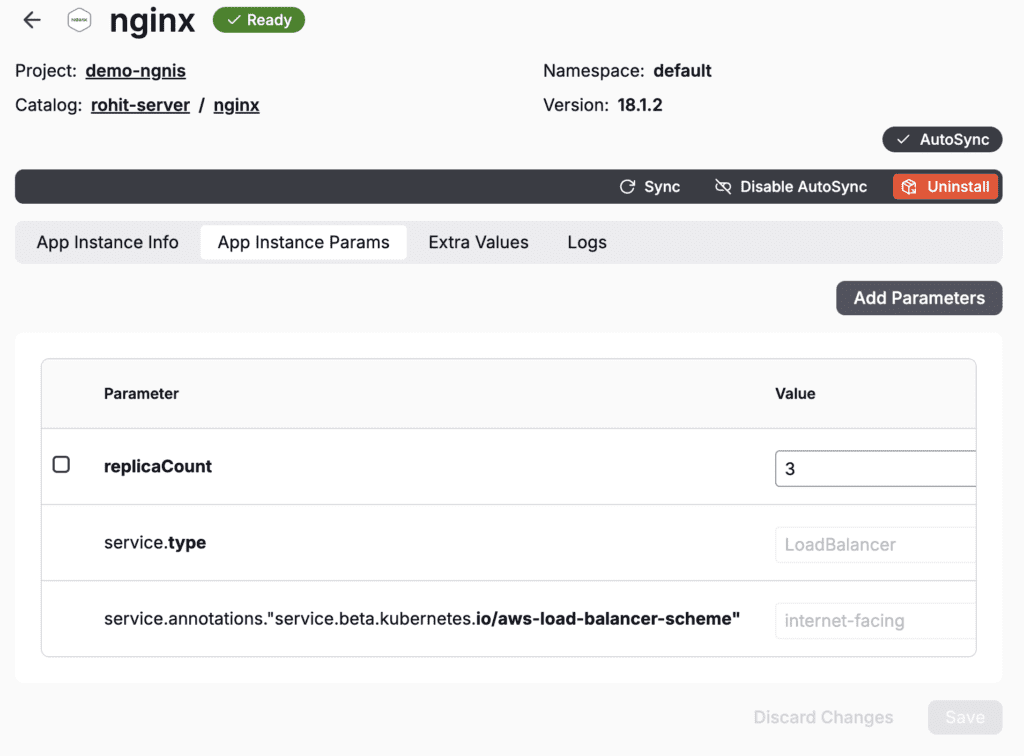
- You can add different parameters depending on your requirements for this application. I am currently using three parameters, as shown below, for this demo.
- Click on Install to apply the changes.
- Once application is up, you should see installation steps available on Info section as shown below.
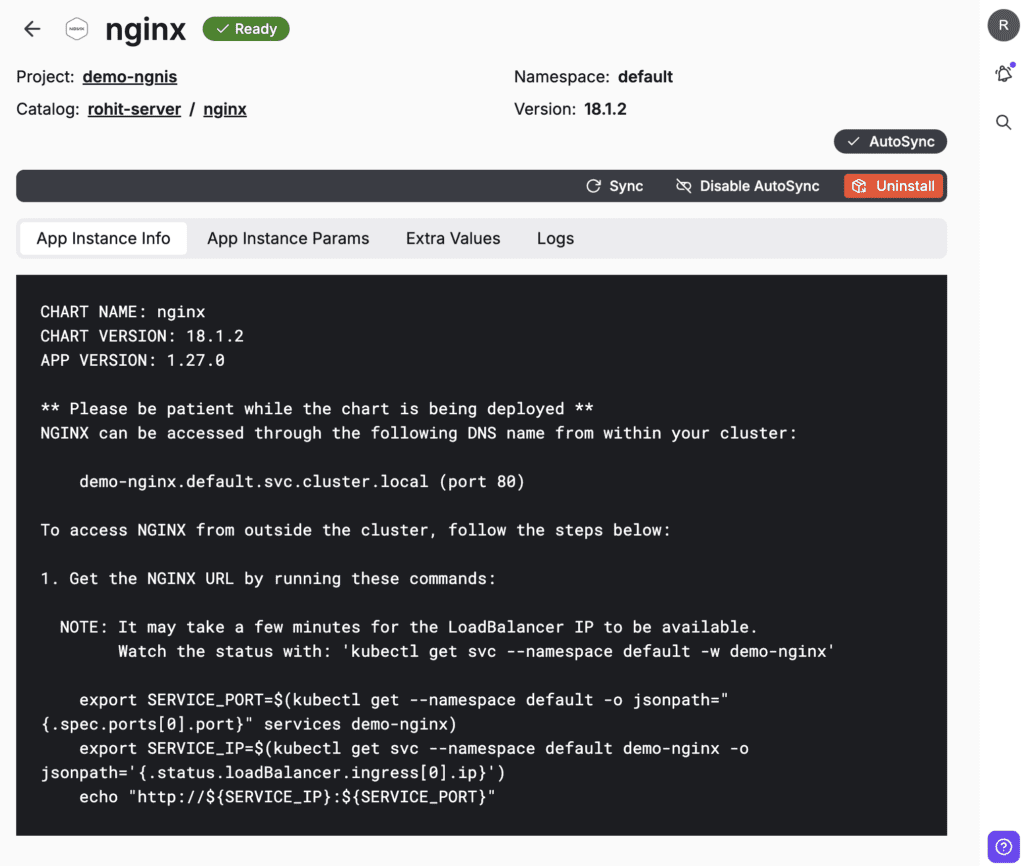
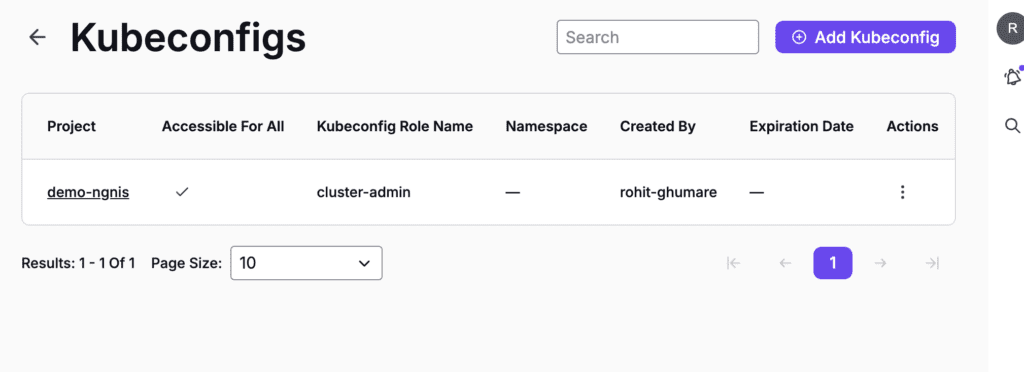
- Hop on to the Kubernetes cluster in your project, Create your own kubeconfig, and access the terminal to run the above script to access your Nginx server.
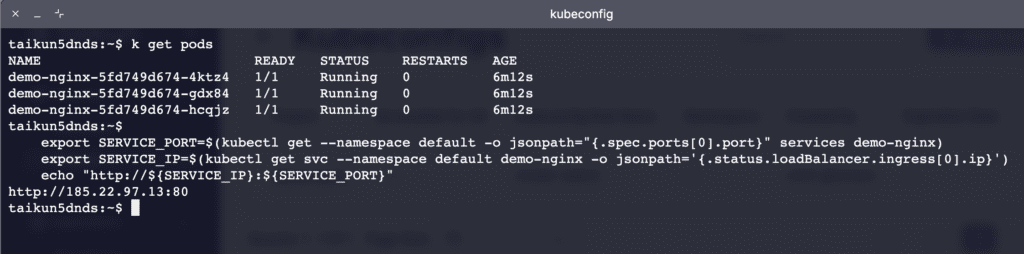
- Access your Nginx server and your exposed
IP:port
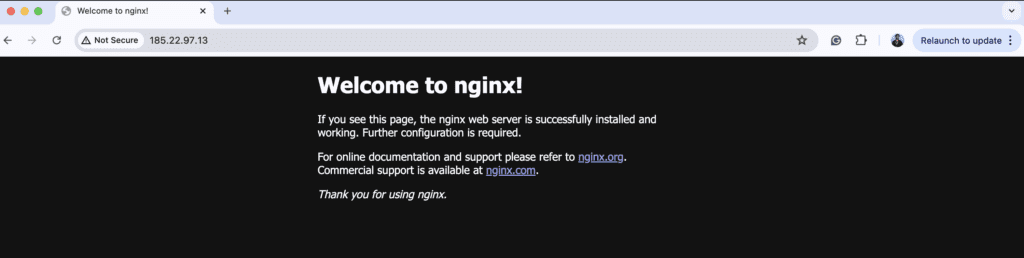
Congratulations!! You have setup an nginx within few clicks on Taikun CloudWorks.
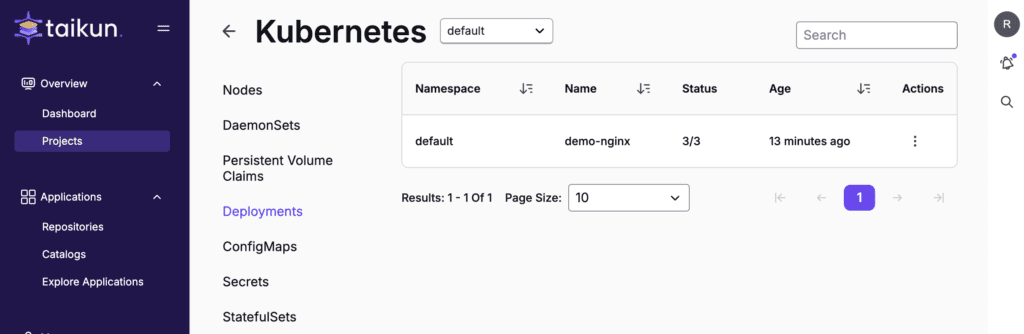
- You can also check your pods and deployments and make changes to your NGINX application from Taikun CloudWorks. Refer to the images below.
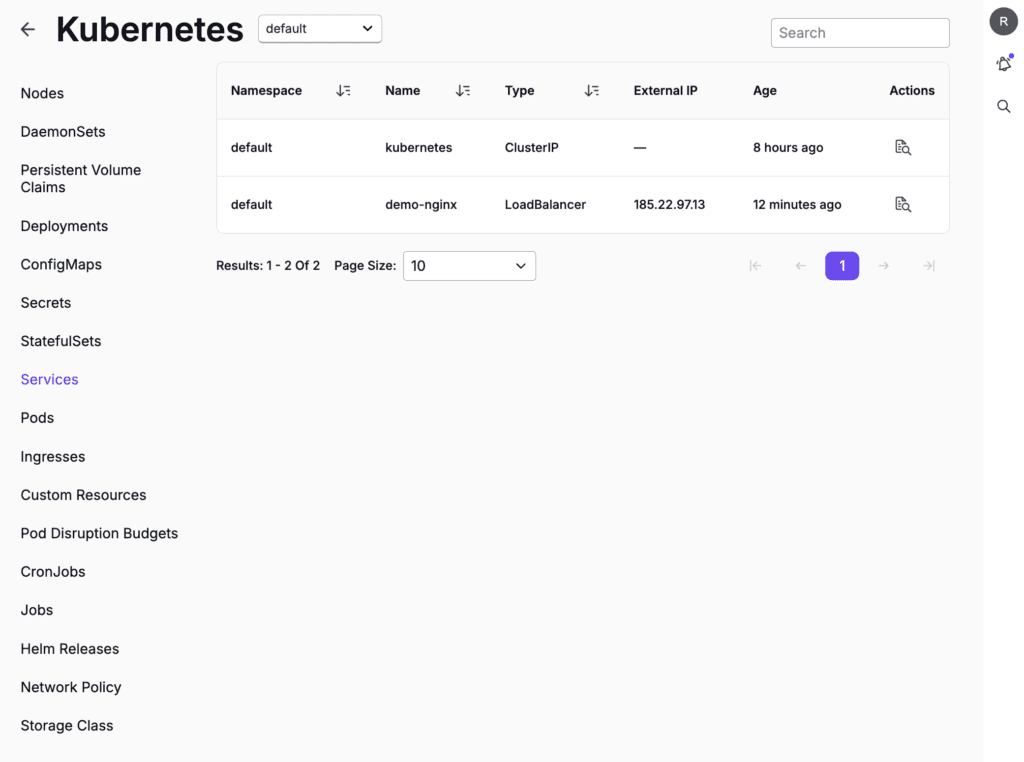
- You can also access LoadBalancer IP in Kubernetes services directly from Taikun CloudWorks UI.

Nginx as a Kubernetes Ingress Controller
Nginx has become a popular choice as an Ingress controller in Kubernetes environments. It acts as a gateway that manages external access to services within a Kubernetes cluster, providing advanced load balancing, SSL termination, and name-based virtual hosting.
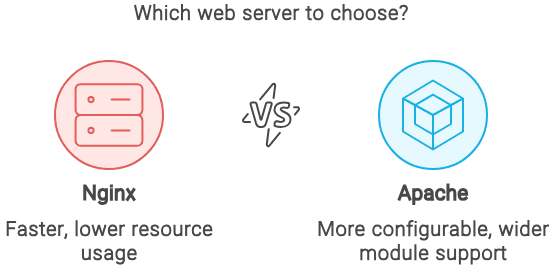
Nginx vs. Apache
While both Nginx and Apache serve similar purposes, Nginx is often favored for its performance with static content and lower resource consumption. Apache, however, is highly configurable and supports a wider range of modules.
Conclusion
Nginx’s versatility, performance, and ease of configuration make it a crucial component in modern web infrastructure. Whether used as a web server, reverse proxy, load balancer, or HTTP cache, Nginx can handle high traffic efficiently and securely. For those managing Kubernetes clusters, Nginx’s role as an Ingress controller further demonstrates its adaptability and power.
Explore Nginx and harness its capabilities to enhance your web applications, ensuring scalability, security, and optimal performance.
For more insightful content and technical guides, visit our Taikun Cloud Blog. Stay updated with the latest trends in cloud-native technologies, DevOps, and security.
