


![]() Manager |
Manager |
![]() Partner
Partner
You can create a new Project straight after adding your Cloud credentials! During the project creation, you can specify various functions to be used.
Create a New Project

Here is how you can create your first Project:
- Go to the Projects menu in Taikun
- Hit Add Project button in the top right corner
- Specify your Project’s name and use Cloud in the pop-up
- (optional) Access, Alerting, Kubernetes, and Policy Profile are initially populated with a default option. These profiles are created with every new organization. Custom Profiles need to be created before being used in your Projects.
Some of Taikun’s features (such as alerting or policy profiles, monitoring, backup, and expiration date) can be added/enabled after your Project is created:
Warning
If you want to use your Access Profile in a project, you need to create it prior to creation of a Project and choose it from a drop-down selection during Project creation.
Project Name – fill in your project name (only alphanumeric lowercase characters and dash are allowed, 3-30 characters; no underscore; e.g., my-project1)
Cloud – choose where you want to store your Project. How to connect a new Cloud, see Cloud Credentials
Specify Kubernetes Version (optional) – if you need a specific version of Kubernetes, select it from the list
Specify CIDR (optional) – if you need you can specify a network or a sub-network
Access Profile – choose a profile that can access the project. For how to create a new profile, see Access Profiles
Alerting Profile – if you have created a profile in Alerting Profiles, you can choose it from the drop-down selection
Kubernetes Profile – first, create a new profile in Kubernetes Profiles and then select from the drop-down selection
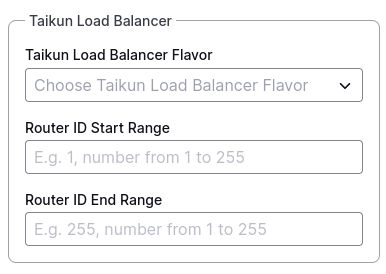
- For OpenStack: if you choose a profile with enabled Taikun Load Balancer, you also have to fill in Taikun Load Balancer Flavor, Router Id Start Range, and Router Id End Range
Add Policy Profile – select a Policy profile for the project
Enable Monitoring – monitoring a Kubernetes cluster allows easy management of containerized infrastructure by tracking the utilization of cluster resources, including memory, CPU, and storage
Enable Backup – choose credentials; you can create a new one in Backup Credentials. If you decide not to enable it, you can change it later.
Add Expiration Date – set project durability; by default, it is set to infinity. After the expiration date, your project is NOT affected, deleted, or locked. It will stay the same.
Enable Serverless – enabling this component allows you to handle events and triggers for your serverless functions. Setting up the DNS records is required.
Enable Spot – enable spots (works for AWS, Azure, Google)
- Allow Spot VMs – allow spots in standalone VMs
- Allow Full Spot Kubernetes – allow full spot on Kubernetes
- Allow Spot Workers – allow spot-on workers
- No Spot for Kubernetes
Add Flavor – bind the flavor to the project; you can bind more than one flavor and un/bind them later in Flavor Info
Enable Autoscaler – define auto-scaling
- Name – specify a name for a new server
- Minimum Workers count – define a minimum count of workers
- Maximum Workers count – define a maximum count of workers
- Disk size – define the size of the disk
- Flavor – bind the flavor for this server